
IceBasin Buyer Guide
Cold Plunge Chiller Dimensions: How to Measure for a Safe Fit
I use cold work like a training tool, not a toughness ritual, and that changes how I answer this question. As an Amazon Associate, IceBasin earns from qualifying purchases.
Practical takeaway
Judge gear by whether it makes the habit easier to maintain, easier to clean, and easier to measure, not by how extreme it looks.
Safety / watch-out
The expensive mistake on this site is buying for fantasy usage. If the setup feels annoying, loud, or high-maintenance, you will stop using it.
Best for
comparing tubs, accessories, and setup decisions without hype
What matters most
price-to-usefulness decisions, maintenance reality, and comfort tradeoffs
Big caution
do not pay premium prices for features that will not change your actual routine
I use cold work like a training tool, not a toughness ritual, and that changes how I answer this question. As an Amazon Associate, IceBasin earns from qualifying purchases.
I measure a cold plunge chiller the way I lay out a weight room: the equipment footprint is only the beginning. You also need room to operate it, maintain it, and move safely around it.
Cold plunge chiller dimensions tell you the cabinet size. A safe fit requires that size plus the model’s ventilation clearances, hose and fitting space, service access, and an unobstructed route into and out of the tub. There is no universal chiller footprint or clearance that works for every model.
My first coaching call: if the setup only fits when a hose crosses your exit path or a fan sits against a wall, choose another layout. Recovery equipment should make the next session easier, including the steps you take getting out.
1. Find the dimensions that actually determine fit
Before comparing chillers, get the installation manual and dimensional drawing for the exact model and revision you intend to buy. A retailer’s shipping dimensions describe the carton, not necessarily the machine. Even operating dimensions may omit hose connectors, handles, filter housings, or detachable accessories.
Confirm which measurement is width, depth, and height. Sellers do not always list them in the same order. Mark the control panel, air intake, exhaust, and water connections on your sketch so you know which face belongs against which boundary.
- Cabinet dimensions: Include feet or casters and any permanent protrusions.
- Connected dimensions: Add unions, valves, hose bends, and external pumps or filters.
- Operating clearances: Record the manufacturer’s required space at each face and above the unit.
- Service space: Check how filters, panels, and drains are accessed.
- Delivery dimensions: Check packaged size, weight, doors, gates, stairs, and turns.
Do not infer cabinet size or cooling performance from horsepower alone. Two chillers with similar horsepower labels can have different housings, pumps, heat exchangers, and operating limits. If the seller cannot supply an installation drawing, request one before ordering.
2. Calculate the full installation footprint
Use a tape measure and painter’s tape to mark the cabinet on the floor. Then mark a second boundary showing the space it needs while connected and running. Measure from the nearest obstruction, including skirting boards, fence posts, shelves, and the tub itself.
Required width = cabinet width + required left-side space + required right-side space. Calculate depth the same way using front and rear requirements. For each side, use the larger requirement when airflow and service space can legitimately overlap. Add them when a component physically occupies part of the required open space. A filter housing is not empty ventilation space.
A worked example, not a universal specification
Suppose a hypothetical chiller is 18 inches wide, 20 inches deep, and 18 inches tall. Its hypothetical manual requires 12 inches of unobstructed space around all four sides. The following calculation shows why a compact cabinet can need a substantial installation area.
| Measurement | Example calculation | What to verify |
|---|---|---|
| Cabinet footprint | 18 ? 20 inches = 2.5 square feet | Operating dimensions, not shipping carton |
| Width with airflow space | 12 + 18 + 12 = 42 inches | Both sides remain unobstructed |
| Depth with airflow space | 12 + 20 + 12 = 44 inches | Front and rear requirements match this example |
| Initial planning area | 42 ? 44 inches = approximately 12.8 square feet | Excludes tub and separate walking space |
| Height and maintenance | 18 inches plus specified overhead access | Filter removal, lid travel, and shelves |
The example’s 12-inch allowance is not permission to use that distance on another model. For a real reference, the Plunge Evolve Standard setup guide specifies 12 inches on sides facing out and requires ventilation and filter-change access. Apply its guidance only to the equipment it covers.
Now place the tub outline beside the chiller outline. Include steps, an open cover, and wherever you will stand to dry off. Walk the route and rehearse sitting down and standing up before buying anything. A floor plan that works only when you turn sideways deserves another pass.
3. Give the chiller somewhere to release heat
A chiller moves heat from the water into the surrounding air, while its electrical operation adds additional heat. A small cabinet may fit under a bench yet struggle there if warm exhaust loops back into its intake.
The Penguin Cold Therapy Chiller manual explains that enclosed spaces can heat up and that recirculating exhaust reduces cooling capacity. Its stated clearance belongs to that manual’s equipment; it is not a substitute for your model’s instructions.
Check the room as well as the gap
An open gap around the machine does not guarantee that a closet or tiny shed can shed heat. Assess room ventilation, expected summer temperature, and whether exhaust points toward another wall or appliance. Ask the manufacturer about enclosed-room suitability; do not assume a louvered door solves the problem.
For outdoor use, verify the unit’s outdoor rating, permitted ambient temperatures, weather protection, and freeze procedure. A roof does not make an indoor-only chiller outdoor-rated. Shade can reduce solar heat load, but a cover or screen must preserve specified airflow and access.
My buying judgment: prioritize an insulated tub, an insulated cover, and a workable ventilation layout before chasing a lower advertised minimum temperature. Those choices address heat entering the system and heat leaving it. A more powerful compressor cannot rescue every cramped installation.
4. Measure the plumbing route, not just the distance
Measure the actual path from each tub port to its matching chiller connection. Include vertical changes, gentle bends, fittings, and enough slack to avoid pulling on ports. A straight-line measurement across the floor usually misses something.
Verify connection sizes, thread types, hose internal diameter, and supplied hose lengths. Matching nominal sizes do not guarantee compatible threads or seals. Avoid solving a tight corner with a stack of unapproved elbows: extra restrictions and long hoses can affect flow.
Pump placement also matters. For example, Penguin’s Cold Therapy Chiller setup notes specify a non-self-priming pump, recommend placement within three feet of the tub drain where possible, and call for the chiller bottom to be at or below the tub bottom. Other systems may differ. Check the required priming arrangement, maximum hose run, and elevation limits for yours.
Leave enough room to maintain the connections
You should be able to close isolation valves, loosen unions, remove the filter, and place a container under a service drain. Check whether the filter bowl drops downward or a cartridge pulls upward. That motion can require more space than the installed housing suggests.
Insulate cold plumbing where appropriate to limit heat gain and condensation. If purchasing closed-cell pipe insulation, match its internal diameter to the hose’s outside diameter and verify suitability for the location. Keep service joints accessible and avoid covering equipment vents.
5. Check the floor, electricity, and exit path
Water weight makes this more than a furniture-placement exercise. One hundred US gallons weighs approximately 834 pounds before adding the tub, equipment, and occupant. Calculate your actual filled load. For a balcony, raised deck, or uncertain floor structure, have its capacity assessed rather than assuming that a visually sturdy surface is sufficient.
The chiller needs a stable, level support surface within the manufacturer’s requirements. Plan for splashes, plumbing leaks, draining, and condensation. Indoor floors and adjacent walls must tolerate the moisture exposure; an absorbent mat alone is not a drainage strategy.
Check the nameplate voltage and current, required circuit, grounding, and GFCI protection. Have an electrician verify the location and electrical installation against the manual and local requirements, including receptacle placement. Do not improvise with power strips or extension cords to reach a convenient corner.
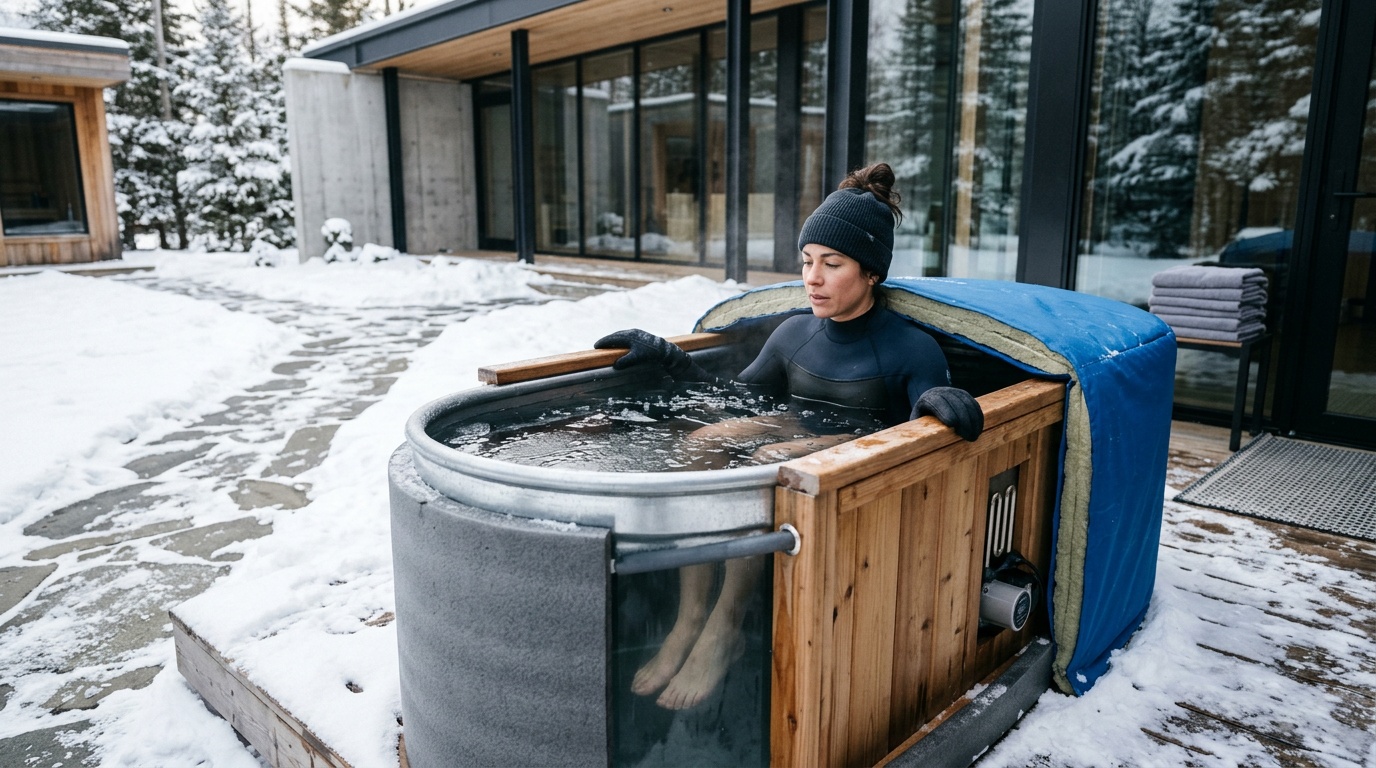
Route hoses and cables away from the entry side. Put stable steps or hand support where the user actually needs them, without leaning on the chiller. Keep the cover’s storage position out of the walkway and make sure another person can reach you.
This layout matters physiologically. Cold immersion can provoke rapid breathing and increases in heart rate and blood pressure; continued cooling can impair coordination. The American Heart Association’s explanation of cold-water risks is a useful reminder that swimming fitness does not remove cold shock. I want an exit that remains simple when someone is uncomfortable or less coordinated.
6. Commission the setup before using it for recovery
Follow the manufacturer’s unpacking and settling instructions, then its filling, priming, and startup sequence. Never run a pump dry. Test the system without a person in the tub, checking every joint for leaks and confirming circulation before judging cooling performance.
- Record conditions: Water volume, starting temperature, ambient temperature, cover use, and target temperature.
- Confirm actual water temperature: Use an independent waterproof digital water thermometer rated for immersion and the expected range. Compare after circulation has mixed the water.
- Inspect during operation: Look for hose kinks, leaks, abnormal vibration, flow errors, and exhaust recirculation.
- Check service access: Confirm maintenance is possible without moving a filled tub or blocking the exit.
Do not equate the displayed setpoint with the temperature everywhere in the tub. Nor should you judge advertised cooling time without matching its test conditions. Cooling capacity depends on water volume, ambient conditions, insulation, and temperature difference. Cabinet dimensions alone tell you none of that.
Build the protocol around the training goal
A 2022 systematic review and meta-analysis found benefits for soreness and perceived recovery after high-intensity exercise, while performance effects varied by outcome and timing. Feeling less sore does not prove that every measure of readiness has recovered.
My recovery judgment is to use cold selectively when short-term turnaround matters, such as a congested competition schedule. During a muscle-building block, I avoid making immediate post-lifting immersion routine. A 2024 hypertrophy meta-analysis suggests repeated postexercise immersion may modestly attenuate muscle growth, with limitations in the underlying evidence. It does not establish a precise waiting interval that guarantees no effect.
Choose temperature and duration deliberately, track your response, and avoid treating the chiller’s coldest setting as a performance target. New users should begin with milder, brief exposure rather than copy demanding research protocols. Keep your head above water, avoid breath-holding, and have another person present. Discuss cold immersion with a clinician first if you have heart disease, uncontrolled blood pressure, fainting episodes, or another relevant condition.
Exit for dizziness, uncontrolled breathing, numbness, or loss of coordination. Chest pain, fainting, or severe breathing difficulty requires urgent medical attention. No timer goal overrides symptoms.
7. Frequently asked questions
How much space does a cold plunge chiller need?
Its cabinet footprint plus model-specific airflow, plumbing, and maintenance space. Measure the tub and exit route separately. There is no safe universal allowance based only on horsepower or product category.
Can I put the chiller in a cabinet?
Only if the manufacturer permits the arrangement and its ventilation and service requirements are met. An enclosure can trap exhaust heat even when there is a visible gap around the machine.
Can I place a chiller farther away to save space?
Possibly, within the pump and manufacturer’s hose-length and elevation limits. Longer runs can add flow resistance and heat gain. Confirm the proposed route before buying longer hoses or relocating the equipment.
What if it fits but the filter cannot come out?
The installation does not fit operationally. Revise the layout before filling the tub. My final pre-purchase check is straightforward: mark the complete footprint, rehearse the exit, and demonstrate the maintenance motions. Buy only after all three work.